2장에서 만들었던 예제 웹사이트를 활용해 동적인 웹페이지를 만들어보겠습니다. 우선 예제 웹사이트의 main.js를 불러와서 하나씩 살펴보도록 합시다.
main.js 코드를 보면
var http = require('http');
var fs = require('fs');
var app = http.createServer(function(request,response){
    var url = request.url;
    if(request.url == '/'){
      url = '/index.html';
    }
    if(request.url == '/favicon.ico'){
      response.writeHead(404);
      response.end();
      return;
    }
    response.writeHead(200);
    response.end(fs.readFileSync(__dirname + url));

});
app.listen(3000);
여기서 몇 줄은 해석해보고 몇 줄은 더하면서 node.js에 알아보겠습니다.
주소창에서 Query string 가져오기
main.js에서 밑에 코드를 주목하여보자.
var url = request.url;
이 코드를 해석하여 보면, url을 가져와서 변수 "url"에다가 저장한다고 볼 수 있습니다. 그렇다면 이 url변수를 출력하여 확인하면 어떤 값이 나올까?
콘솔 값을 보기 위해 밑에 코드를 추가시켜준다.
console.log(url);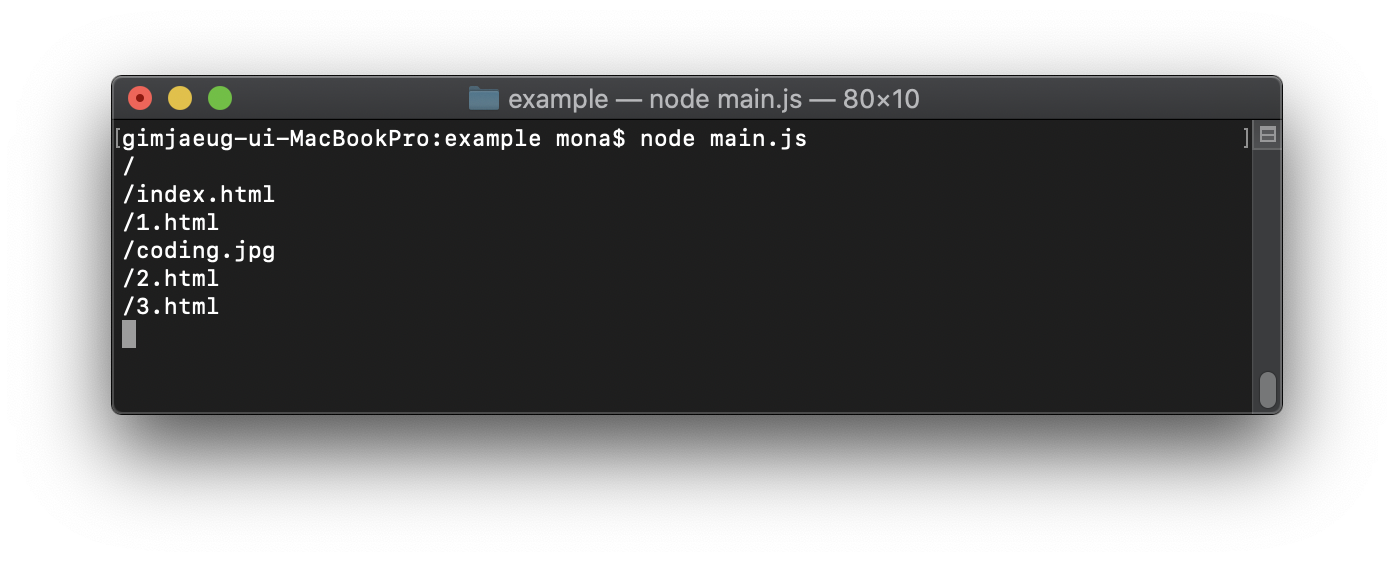
서버 콘솔에 출력된 값을 보았을 때 우리는 사용자가 웹사이트를 "/" -> "index.html" -> "1.html" -> 2.html" -> "3.html" 순서대로 이동했다는 것을 알 수 있다.
따라서 request.url을 통하여 얻은 url은 도메인주소 뒤에있는 값 들을 반환해주는 것을 알 수 있다.
주소창에서 Query 객체 가져오기
예제 코드에 url모듈을 가져오는 코드를 추가해봅시다.
var urlmodule = require('url');
이제 url모듈을 이용하여 다양한 메소드를 사용할 수 있습니다. 대표적으로 "parse"라는 메소드를 사용해 주소창의 query 객체를 가져와 봅시다.
var queryData = url.parse(request.url, true).query;이러면 변수 "queryData"에 query객체가 저장됩니다.
마찬가지로 query객체 값을 보기 위해 콘솔출력을 해봅니다.
console.log(queryData);
보는 것과 같이 {}으로 아무것도 없다고 나옵니다. 그렇다면 강의에 나온대로 "localhost:3000/?id=HTML"을 주소창에 입력해보자.
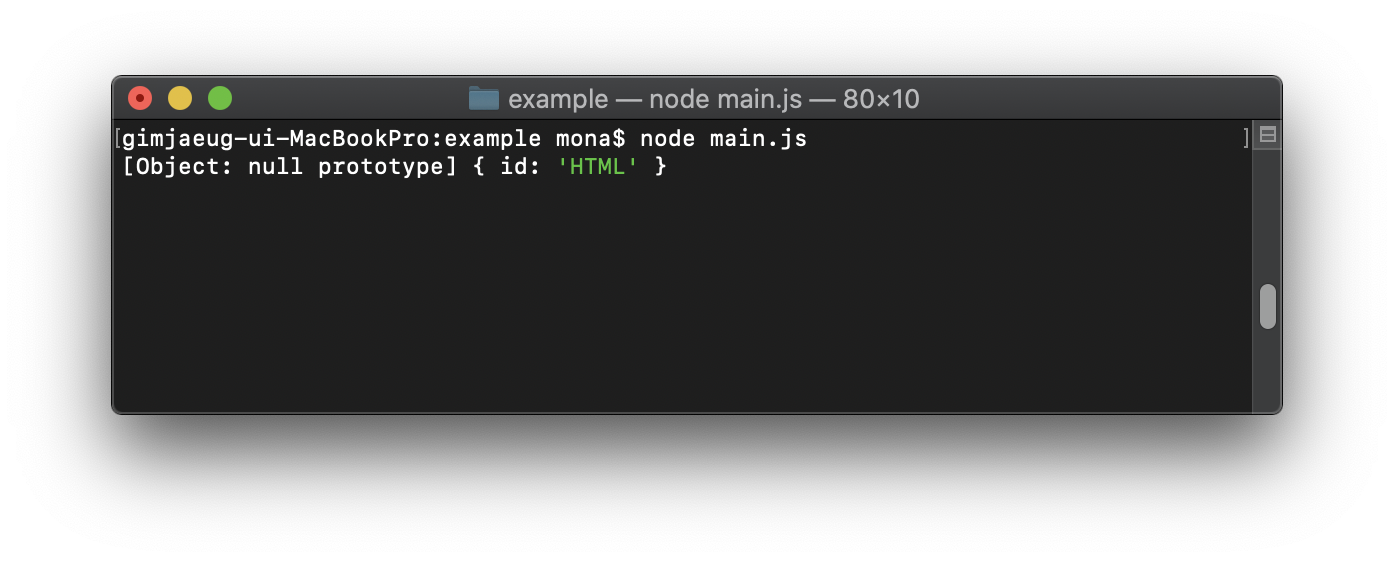
id: 'HTML'이라고 queryData가 출력되어 나타납니다. 그렇다면 조금더 응용하여 밑에 코드처럼 넣어보면 어떨까?
console.log(queryData.id)
보는 것과 같이 정확한 String값이 출력되게 됩니다. 우리는 위의 테스트를 통하여서 query객체를 확인하였고 id라는 변수를 출력하여 보는 것을 배웠습니다.
Query 객체를 이용한 동적인 웹페이지 만들기
변수를 선언하고, 그 안에 html의 내용을 모두 집어넣을 예정입니다. 우선 밑에 코드를 보면서 따라해봅시다.
var template = `
<!doctype html>
<html>
<head>
  <title>WEB1 - Welcome</title>
  <meta charset="utf-8">
</head>
<body>
  <h1><a href="index.html">WEB</a></h1>
  <ol>
    <li><a href="1.html">HTML</a></li>
    <li><a href="2.html">CSS</a></li>
    <li><a href="3.html">JavaScript</a></li>
  </ol>
  <h2>WEB</h2>
  <p>The World Wide Web (abbreviated WWW or the Web) is an information space where documents and other web resources are identified by Uniform Resource Locators (URLs), interlinked by hypertext links, and can be accessed via the Internet.[1] English scientist Tim Berners-Lee invented the World Wide Web in 1989. He wrote the first web browser computer program in 1990 while employed at CERN in Switzerland.[2][3] The Web browser was released outside of CERN in 1991, first to other research institutions starting in January 1991 and to the general public on the Internet in August 1991.
  </p>
</body>
</html>
`;
여기서 사용된 그레이브악센트(`)는 문자열과 변수를 효율적으로 사용하기 위해 만들어진 자바스크립트만의 기능입니다. $표시와 {}를 통해 변수를 삽입해 문자열처럼 사용할 수 있게 됩니다. 우리는 이것을 Template Leteral 이라고 부릅니다. Template Leteral을 사용한 이유는 변수를 효율적으로 사용하기 위해서 파일안에 변수를 삽입해 동적인 페이지를 만들기 위해서입니다.
title이라는 변수를 선언하여 제목을 변수로 대체하여 봅니다.
var title = query.idvar template = `
<!doctype html>
<html>
<head>
<title>WEB1 - ${title}</title>
<meta charset="utf-8">
</head>
<body>
<h1><a href="/">WEB</a></h1>
<ol>
<li><a href="1.html">HTML</a></li>
<li><a href="2.html">CSS</a></li>
<li><a href="3.html">JavaScript</a></li>
</ol>
<h2>${title}</h2>
<p>The World Wide Web (abbreviated WWW or the Web) is an information space where documents and other web resources are identified by Uniform Resource Locators (URLs), interlinked by hypertext links, and can be accessed via the Internet.[1] English scientist Tim Berners-Lee invented the World Wide Web in 1989. He wrote the first web browser computer program in 1990 while employed at CERN in Switzerland.[2][3] The Web browser was released outside of CERN in 1991, first to other research institutions starting in January 1991 and to the general public on the Internet in August 1991.
</p>
</body>
</html>
`;
이제 마지막으로 template변수를 출력해주어야 하기 때문에 코드 한 줄을 더 살펴보아야한다.
예제 코드의 마지막부분에 다음과 같은 코드를 볼 수 있다.
response.end(fs.readFileSync(__dirname + url));이 코드는 파일을 읽어와서 출력한다는 내용인데, template변수를 출력하기 위해서는 다음과 같이 코드를 교체할 필요가 있습니다.
response.end(template);이제 서버를 키고 주소창에 "localhost:3000/?id=HTML" 이나 "localhost:3000/?id=CSS"등을 입력해보면 다음과 같은 결과를 얻을 수 있습니다.


마무리
이번엔 하나의 파일에서 동적인 표현을하는 웹페이지를 node.js를 이용하여 만들어 보았습니다. 다음 번에는 마지막 부분에서 살짝 다룬 파일을 읽어서 출력하는 부분을 배워보도록 하겠습니다.
'코딩공부 > Node.js' 카테고리의 다른 글
| [NODE.JS] #04장 파일 읽기 (0) | 2020.02.06 |
|---|---|
| [NODE.JS] #02장 예제 실습코드로 서버 만들기 (0) | 2020.01.24 |
| [NODE.JS] #01장 Mac에서 Brew를 이용한 Node.js 설치 (0) | 2020.01.07 |